Note: I purchased the Ozark Trail 10-person dome tent. This post contains affiliate links.
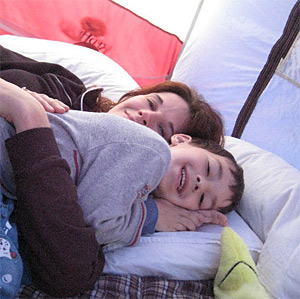
I love to camp. My parents were (and still are!) avid campers. My earliest childhood memory is camping in my mom and dad’s big blue canvas cabin tent. Incredibly, that big canvas tent is still around too, more than 40 years after they bought it. A well-cared-for canvas tent will last almost forever! I’ve borrowed their tent a few times over the years, but it weighs at least 70 pounds, and its box is nearly the size of a casket.
Years ago, when I got out of college, I started looking for the perfect tent. As I’m sure you know, I research everything to a fault before I make a purchase..! Tents come in all shapes, sizes, and prices. As with nearly everything I buy, I wanted the best quality item for the most reasonable price.
After considering all of the criteria, I narrowed my list down to the following “wish list:”
- Dome-style or tunnel-style nylon tent
- A tent with four poles or fewer
- A tent I could set up alone in under 10 minutes
- A tent that didn’t require guy lines
- A tent with a full rainfly
- Bonus: A tent with a vestibule door
After helping friends set up their multi-room, multi-wing McMansion tents, I knew I didn’t want a tent that was complex or difficult to set up. (One friend’s crazy Y-shaped tent comes to mind — working together, it took us more than 45 minutes to pitch! No thanks.) Dome and tunnel-style tents are self-supporting, with one large central room. Some tents require staked-out guy lines for support, but self-supporting tents don’t. They don’t have a lot of poles, and they’re pretty easy and quick to set up. I wanted a nylon tent — they’re lightweight, and they pack down to very small sizes.
The search became trickier with my next two wish-list items – a full rainfly and a vestibule door. Why a full rainfly? Most tents on the lower end of the price range have rainflies that only cover the top portion of the tent walls:
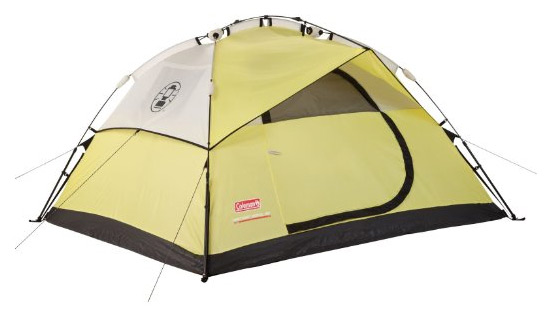
This isn’t the best style of tent to withstand a rainstorm. Tent walls aren’t waterproof — they’re made of breathable nylon. Rainflies are waterproof. And, in a torrential rainstorm, while the top of the tent’s roof may be impervious to water, the walls won’t be. You may think, “We just won’t camp in the rain.” I can tell you that no one plans to go camping in the rain, but it happens.
Better-quality tents have a full rainfly that extends to the ground. This gives you a double-walled tent, one that you can safely touch, lean against, and pack gear against on the inside. There are a few inches of space between the outer rainfly wall and the inner tent wall — a much better design to protect your gear, and yourself, from rain.
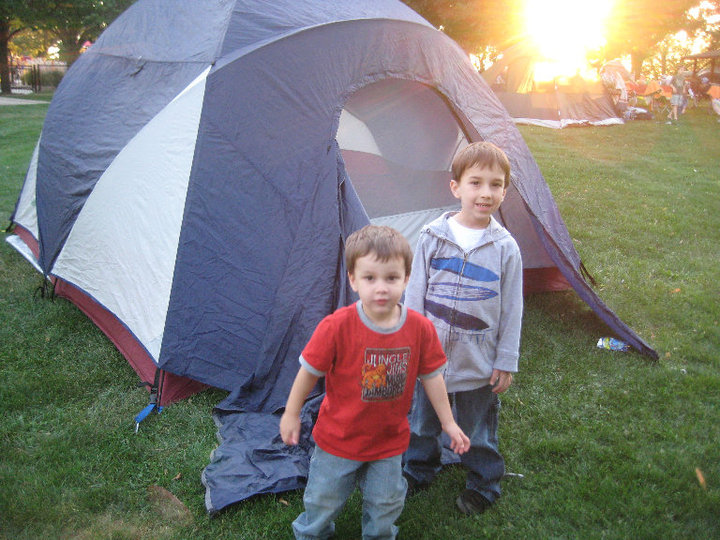
Some tents also have a vestibule door. This is an extension of the rainfly that covers one or more tent doors. It creates a space where you can kick your shoes off or store gear outside the tent and still have your things located “inside” the tent’s fly. It also adds another level of protection when you’re entering and exiting a tent while it’s raining. If you open a tent door without a vestibule during a rainstorm, the rain is going to fall into your tent. With a vestibule, you can open the vestibule door, zip it shut to protect you and the tent’s door from the rain, and then open the front door of the tent.
After much research, I purchased the tent you see in the photo above. It came from Bass Pro Shops, and it’s a Redhead (their house brand) 10′ x 9′ tent. If I recall correctly, I paid around $200.00 for it. The tent’s description would tell you that it sleeps eight, but that means eight people could lay four across, two down, head to toe, with no room for any other gear inside. It sleeps three to four people very comfortably.
I’ve never been a small tent girl. I have friends who pride themselves on camping in the smallest tent possible, counting the ounces they can reduce from their gear packs by removing the cardboard center from a roll of toilet paper. I love the outdoors, and I love camping, but I am not one of those “minimalist is best” people. (And I mean this in the kindest way possible, backpacker friends!) Give me a tent that’s large enough to have some space to live in versus one I can crawl into simply to sleep. Especially if it rains. We’ve spent quite a few rainy days in this tent without everyone getting cabin fever.
The Redhead tent has served our family very well — it’s 18 years old, and it’s in just as great shape as it was when it was new. I’ve always taken excellent care of it over the years, and there are no rips, tears or broken zippers. The seams are still sealed, it’s still watertight, and the floor has no holes in it. This tent has proven to be an excellent investment that took me from “me and a dog” camping to camping with a dog, a husband and a daughter, to camping with a dog, a husband, a daughter, and two sons.
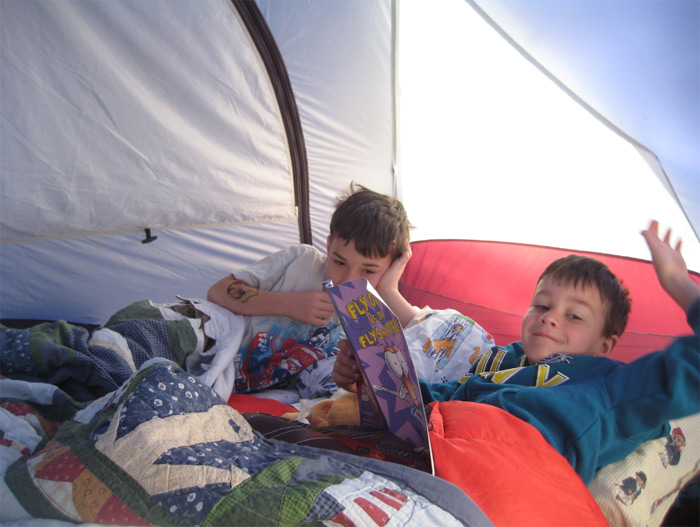
After our first spring campout this year, we noticed something. Our family wasn’t quite as comfortable in our tent as we used to be. Our “young” daughter is now 18. Our boys are no longer infants and toddlers, and they’ve moved up to adult-size sleeping bags. I will always keep the Redhead tent around as I still love camping in it, but I realized it was time to look for a tent that could accommodate all of us — with special consideration for the fact that our growing boys will continue to grow.
I started looking for a new tent, and I realized that my list of tent requirements hadn’t changed — I really wanted a larger version of the tent we currently have. My husband added “A door I can walk through standing up” to his tent wish list (the old tent is about 6′ high in the middle but lower at the doorways.)
As with my previous tent search, finding a reasonably-priced tent with all of these features was not easy. Premium brands, like Kelty and Eureka, were pricey, but they didn’t offer an increased capacity over our current tent. (Check out the Eureka Mansard 8 Tent — it looks great, but it sleeps 8 and is $621.50. This Kelty Parthenon 8 Tent
is $482.47, but it also sleeps 8. It also doesn’t have a full rainfly on the sides.)
I checked Bass Pro Shops’ site too, but they didn’t have anything comparable to our current tent. Cabela’s had some nice (and expensive) four-season tents. While we do camp in winter on occasion, we don’t do it often enough to warrant the even higher prices of these tents. (How high? Here’s a Mountain Hardwear 10-person 4 season tent for $2750.00. Ouch. It’s far more tent than we need!)
As I continued my search, I came across this tent on Walmart’s site:
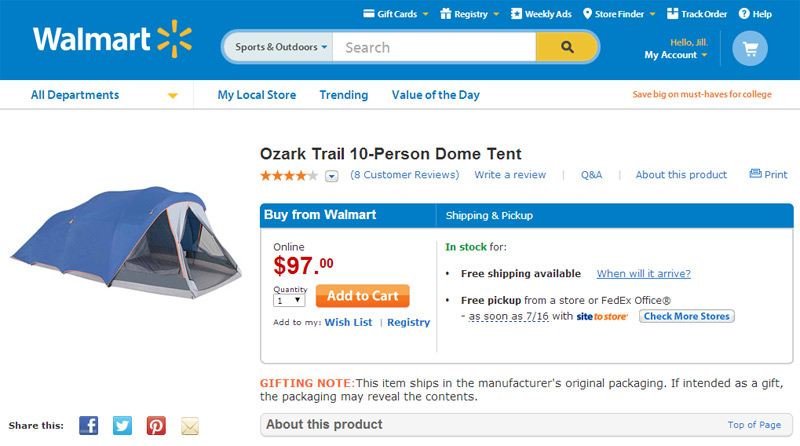
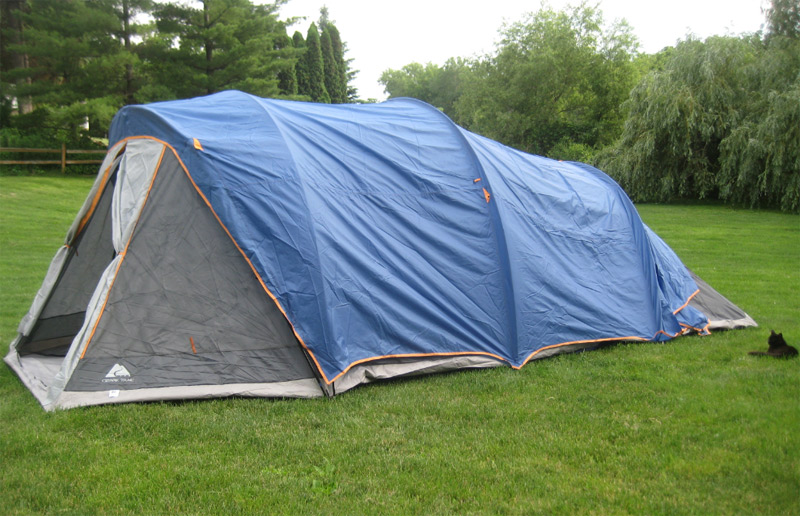
The Ozark Trail 10-Person Dome Tent — could this be the Cataldo family’s next tent?
At 20′ x 10′, this tent is more than twice as large as our current 10′ x 9′ tent! I’ve read mixed reviews of Walmart-branded tents, but look how many features on my “wish list” that this tent has:
- Dome-style or tunnel-style nylon tent: This is a polyester tent, not nylon.
- A tent with four poles or fewer: Check!
- A tent I could set up alone in under 10 minutes: Check!
- A tent that didn’t require guy lines: Check!
- A tent with a full rainfly: Not quite. It covers more than 3/4 of the tent though.
- Bonus: A tent with a vestibule door: No.
- Bonus: A door you can walk through while standing up: Check! The tent is over 6′ tall!
While it wasn’t perfect, I figured for $97.00, it was pretty close to what we were looking for. That price is hard to beat for such a large tent! From the photos, the rainfly looked like it fully covered almost the entire tent, and I thought that once I got it home, I could sew a vestibule add-on to complete it and make it into a full-fly tent. (You guys know how much I love tackling cool sewing projects!)
Reviews of this tent on Walmart’s site were generally positive. I read another extensive review of this tent at CampArizona.com and decided to buy the tent. Walmart has free shipping for orders over $50, and the tent arrived at our door a few days later.
We camped in the new tent over Independence Day weekend, and here are my thoughts:
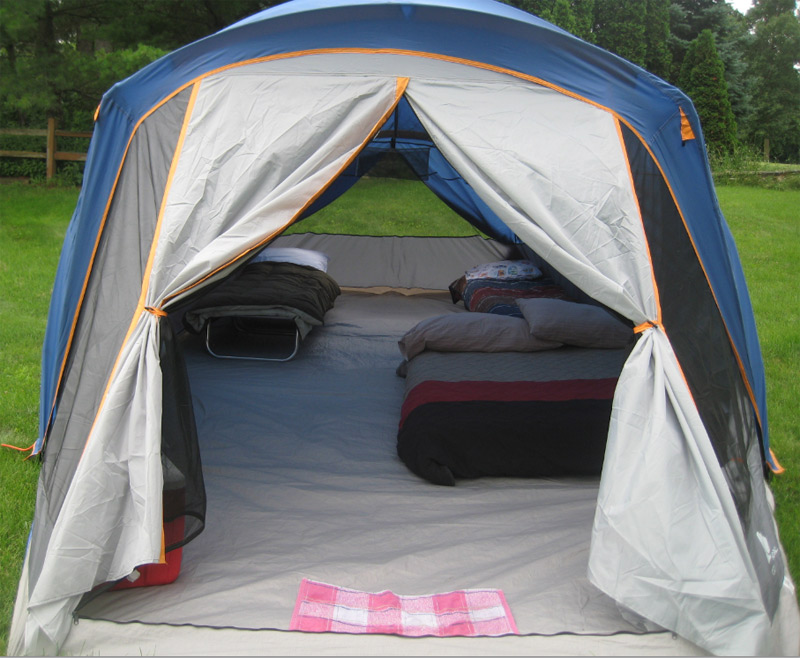
This is a very large tent! We camped with two cots and a queen-size airbed, and as you can see, there was plenty of room in the tent to move around. We definitely felt comfortable in this spacious tent.
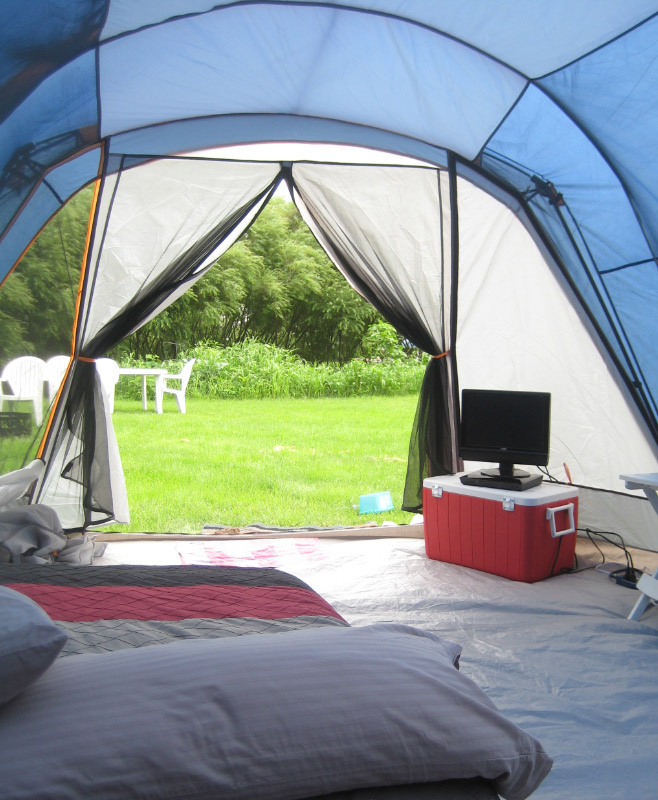
Here’s another view from the back of the tent, looking toward the door. Because this was a backyard campout, we plugged into the house’s electricity and indulged the kids in a non-roughing-it movie night in the tent! This was partially made possible by a feature many new tents have now:
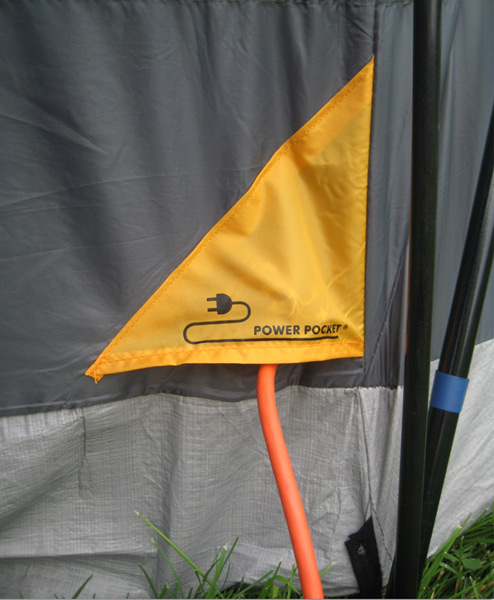
Yes, that’s a “Power Pocket!” It’s a pass-through to run an electrical cord into the tent. We don’t always camp in areas with electrical hookups, but it’s a nice feature to have when we do.
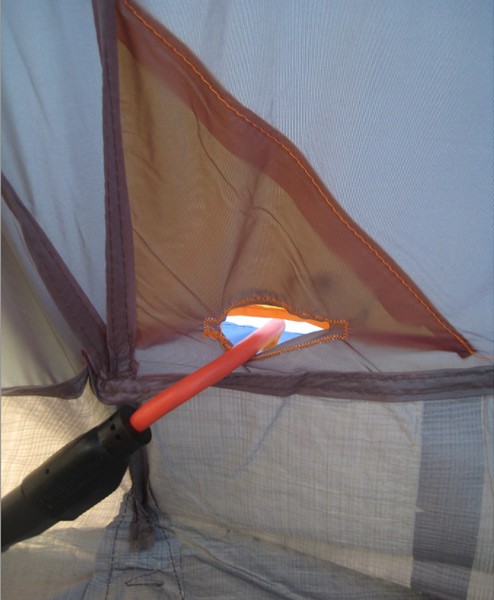
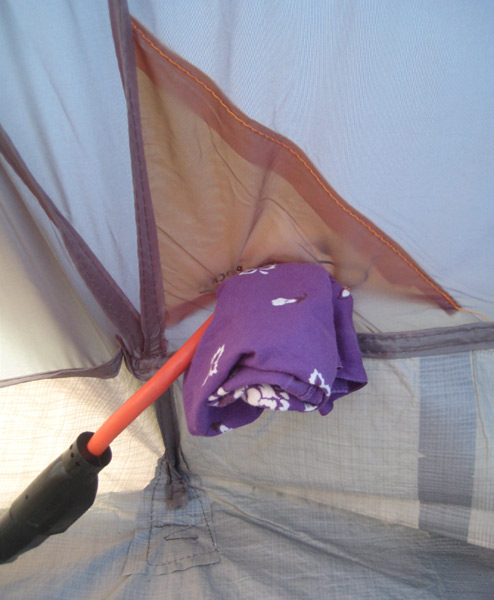
We did notice though that with an extension cord in the port, the port tends to hang open. I stuck a bandanna in the opening to keep insects (or other critters!) from investigating the port.
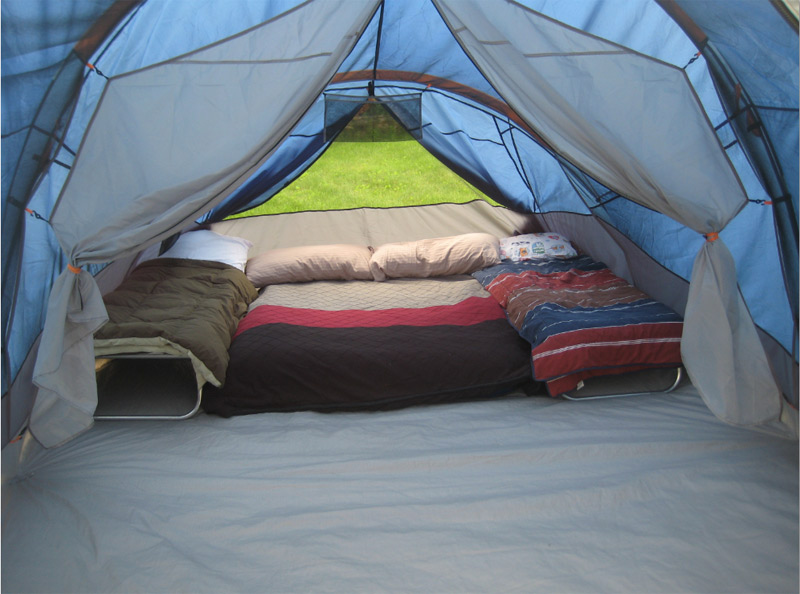
This tent also has a partition you can hang to divide the tent into two rooms. It clips to rings installed in the middle of the tent. There is a hanging gear loft in the back and two gear pockets along the interior sides of the tent — handy for storing your keys, phone, sunglasses, or other items you wouldn’t want to step on.
To give you an idea of how spacious this tent is, I slid our queen airbed into the back between the boys’ cots…
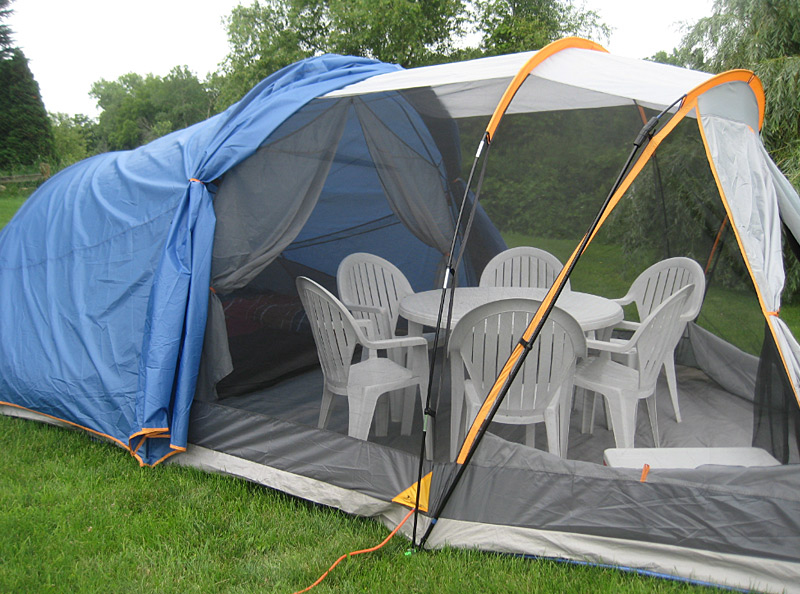
… and moved our lawn furniture inside! That’s a 45″ patio table and six chairs. If you had to spend the entire day in this tent in the rain, you could comfortably do so. And, for when it’s not raining, the rainfly rolls and clips back so you can use the front portion of the tent as a screen room.
There are two zip-open windows at the front of the tent. The back of the tent has a zipper on the outside of the rainfly to open the fly and allow air through the tent.
There are some differences in quality between our older tent and this one, which certainly can be expected for the difference in price. Some of this tent’s seams aren’t sewn (cosmetically) as nicely as I’d like to see:
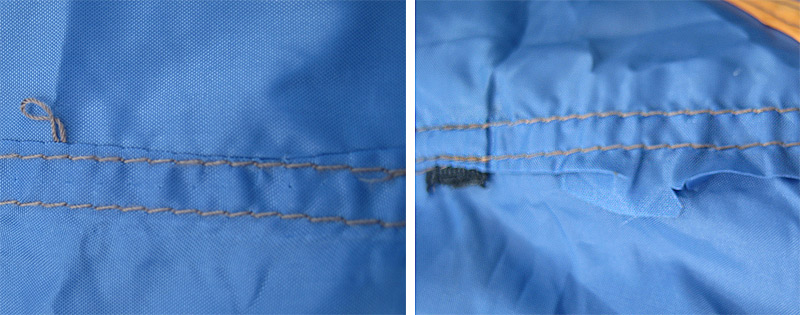
If this was a more expensive tent, I’d probably fuss a little more about things like this. The seams are seam-sealed on the back though, so they won’t leak.
This tent is made of polyester, not nylon. In looking at a lot of other brands, it seems that many tents are made from polyester now. Higher-end tents are made from ripstop nylon.
Our older tent has a thick nylon floor coated with a rubberized material. This Ozark Trail tent has a polyethylene floor — what I like to call “blue-tarp material.” I do think this is the weakest portion of the tent, as I think we all know what those tarps look like with years of heavy use. I’ve got one on my woodpile that looks like this:
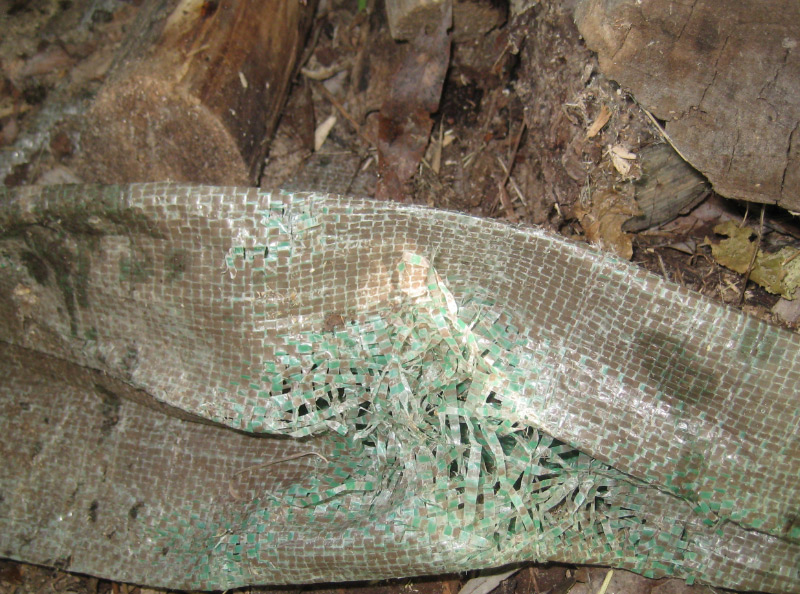
We’ll definitely try to take care of our new tent’s floor so it doesn’t end up like this!
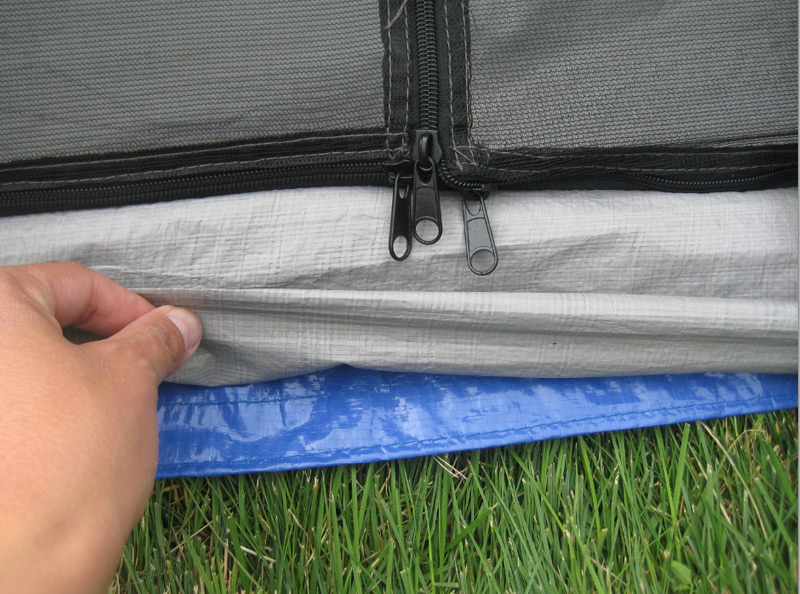
The tent floor is a tub-style floor, which is good – this means the seams where the floor meets the walls are raised off the ground a few inches. This helps keep water out of the tent when the ground is wet or flooded.
I always use a tarp as a footprint for my tents, so I picked up this 9′ x 19′ blue tarp from Harbor Freight – the perfect size! I also replaced the tent stakes with heavy-duty steel stakes, something I would do with any tent. I’ve bent and broken way too many plastic and aluminum tent stakes over the years. This style of stake is strong, doesn’t bend, and can be driven into hard ground.
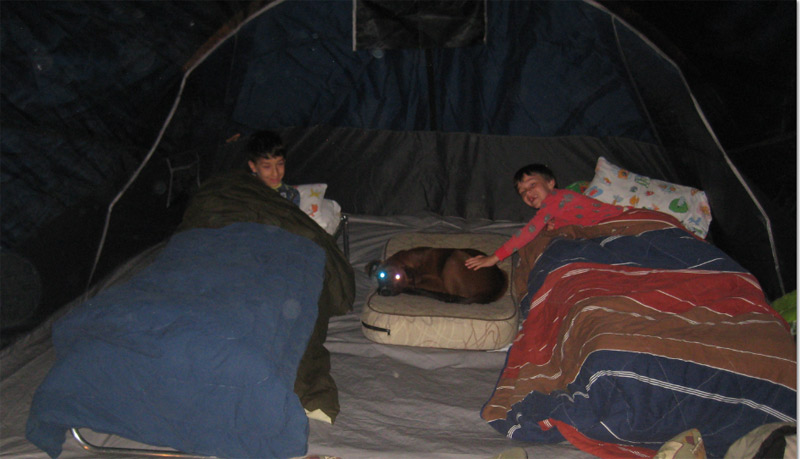
We’re pretty happy with this tent. It’s extremely easy to set up – I set it up by myself in about ten minutes. It’s self-supporting, so you don’t need another person’s help to pitch it. Our entire family — including our dog — loves the additional space in this tent.
But I still plan to extend the rainfly. With the design of this tent, it will be easy to do. (Update – later this summer, I did! I posted photos and details of the sewing process at this link in the comments below.)
2018-2019 update: The version of tent that we purchased has been discontinued and updated with this new Ozark Trail 10-person tent. Check it out if you’re looking for one like the one we purchased. We have been using this tent for five years now and are still loving it!
Note: I purchased an Ozark Trail 10-person dome tent. This post contains affiliate links.


Outlander says
Oh my gosh, it’s like TARDIS! It’s bigger on the inside! :)
P.S. What did the poor cat do, that it was banned from the tent? :)
mygoldcloud says
Hi Jill,
I showed this to my husband and he wants to buy this tent. Only last year we bought one for about the same price and used it just once. We are a family of three and our 8 person tent feels too small for us. Like you, we are not small tent people either(all three of us).
Thanks for the pictures and details.
Supermom10 says
Thanks so much for posting this. We just went camping at the Grand Canyon – it was suppose to be 5 days but because of torrential rain and hail it was cut to two! So we will have to look into this tent maybe…. Our current tent goes on the back of our truck and is fine for three of us and our dog but when we go out – we have to take the tent down…. Camping at Disney sounds great too – wonder if they have that at Disneyland.
Neil says
I would have to disagree with their idea of a thick tarp like floor. These are considered a bathtub style. I’ve hiked and camped many many times, and I always will choose the water proof heavy duty thick floor! Trust me never buy a tent that will make you worry that you might wake up in a puddle! Coleman makes some large 8 person dome tents with plenty of room, 3 poles, fast setup, and full rainfly, and the thick tub bottom. Also available at Walmart.com for around 105$.
wolfmom says
Just checked out this tent on Walmart.com. The price has gone up $50!! Must be the increased spike in purchases after your nice review. Walmart is cashing in on you, Jill! lol
palatino says
We are former campers and have been considering a camping trip with our grandchildren. We’re going to need a large tent so we really enjoyed this review!
Just had to share I was on Walmart’s site looking for this tent and I read some horrifying reviews of another tent they sell:
https://linksynergy.walmart.com/fs-bin/click?id=edWvPoxhjjY&subid=&offerid=233310.1&type=10&tmpid=1082&RD_PARM1=http%3A%2F%2Fwww.walmart.com%2Fip%2FOzark-Trail-Tundra-Plus-25.6-x-20-x-6.2-Tent-Sleeps-9%2F22066536
We so understand wanting something easy to set up. Go read the reviews of this other “big” tent. Part of it has no floor and is open to the ground, and it has 72 (!) stakes to set it up. We were roaring!
amjacobs909 says
Jill,
We’re going camping the last weekend of September up in Northern Wisconsin, and it can get very cold at night. With all the mesh walls on this tent, do you think it would be warm enough on a cold night?
Thanks!
Coupon Maven says
I realize this reply is very late – I’m sorry that I didn’t see your question earlier. The latest in the year we’ve camped in this tent was in October of last year, and the weather dipped into the 30s. We did plan ahead and bring lots of blankets, but we found the tent to be warm enough – at least as warm as our RedHead tent in comparable conditions.
Neil says
You need to look specifically for a 4 season tent. They usually have little to no mesh and have full separate rainfly. But they can get very expensive, I have a northface 4 season 2 person and it was 400$ on sale 10 years ago. For what you pay for it, keep it nice, and it will last forever.
Coupon Maven says
I got an email this week from a reader asking if I had ever modified this tent’s rainfly and how I did it. And, I saw tonight that I have had some Facebook questions about the fly extension in the comments. (Thanks, Facebook notifications, for not sharing these when they were posted in September..! *facepalm*)
Better late than never, right?
I finished the rainfly extension this fall, and here’s how it turned out:
There are plenty of photos of the tent without the fly extension above, so you can scroll up to compare if you want. I designed the fly to attach to the front pole and tuck under the edge of the existing rainfly. Here’s what it looks like with the existing blue fly pulled back:
I used Velcro to make straps to stick around the existing tent pole, the same way the current fly attaches to these poles — four on each side and one on the top.
The center has a zipper under the folded-over seam — I made it wide so it would cover the zipper when it rains.
On one side, I added a tie-back in the side seam so that it can be tied open. I made the tent fly longer than the tent itself by about three feet to create a vestibule for gear storage:
I’m really happy with how it turned out. I like having a place to store our folding camp chairs and other items, and this works out perfectly.
More details if you want them: I made the fly out of 200 denier waterproof “Oxford Grey” coated nylon that I ordered from SeattleFabrics.com online. I ordered 11 yards at $4.99/yard ($54.89 — this was not a cheap project, especially considering what the tent cost..!) and I got the zipper from JoAnn fabrics locally. It’s a nylon sleeping bag zipper, and that, ultimately dictated the length of the fly — I learned that long zippers are -expensive- and it was more cost-effective to simply use the longest zipper I could buy in the store. This zipper was $13.99, and I used a 40% off coupon and paid $8.39 and tax for the zipper. I had Velcro and webbing on hand already. I also bought Gütermann thread after reading on several tent-making websites that regular (cheaper) thread would not be sufficient for something that may be subjected to the elements long-term. I think that was around $3 per spool and I used four spools (they’re small.)
I referred to this Sewing Outdoor Gear infographic quite a bit when sewing the loops and Velcro to the fly. Also, I sewed the whole thing on my household Singer sewing machine, which was quite a feat. This fabric is VERY slippery with the waterproof coating on the back. It did not make this the easiest project. Measuring, cutting, etc was easy compared to actually sewing it together..! I also did not pin any of the fabric because I didn’t want to introduce any pinholes to its waterproof surface. I used clothespins to hold everything together while sewing.
I made nylon webbing stake loops at the front corners of the fly, and there’s one in the middle too to make zipping and unzipping easier (because you don’t have to hold the bottom of the fly to zip and unzip it. Once it was finished, I flipped it over and used seam sealer on the back of all of the seams. That’s about it!
Wendy says
Can you make me one (rain cover)?
Coupon Maven says
Honestly, with the time and labor involved, I wouldn’t even know what to charge for that :) The fabric is not cheap – I had $54 in fabric alone, plus the zipper, heavy duty thread, seam sealer, elastic & tabs — it brought it dangerously close to the cost of simply buying a second tent and altering the fly from that one. I also sewed this on a home sewing machine, which was probably not the best thing to use, but it’s what I have. The nylon is extremely slippery due to the coating on it, and it was a slow project to sew.
Pam says
I purchased the same Redhead tent, you pictured. Unfortunately, there were no instructions on setting it up. You wouldn’t happen to have the instructions by chance would you? Or at least tell me if you use the short poles on tent or fly. It seems there is excess strapping when you lock in rain fly to tent.
Thank you!
Pam
Coupon Maven says
I do have them! Give me a little time to unpack the tent and I’d be happy to photograph for you. Our RedHead tent came in a blue duffel bag, and the instructions are sewn into the lining of the bag on a Tyvek flap.
For ours, all four poles are used on the tent and none on the fly. The two long poles criss-cross the tent corners – make an X with them and lay them directly over the top of the flattened tent, and you’ll see what I mean. The shorter two poles each make an arc over the front and back doors, and they attach with the quick-clips over each door.
You can see the outline of the shorter pole making an arc over the door under the rainfly in this picture.
The fly buckles onto the tent via the black “seatbelt” style locks on webbing straps. You can also run guy lines and stakes to pull the fly out, but we rarely do. We simply stake the front and back vestibules down to hold them open, but again — no poles at all go on the fly. Just pull the fly straight out from each door and put stakes in both of the corner loops. This will pull the fly nice and tight.
I wrote “short” and “long” with a Sharpie on the metal tips of each end of all poles one of the first times I set this tent up — it makes it a lot easier to tell which poles you’re working with when they are collapsed, because they do all look the same when they’re in the bag — and when you set them up, the short ones aren’t that much shorter unless you line all the assembled poles up with each other and compare.
Pam says
It sounds like how I’ve been doing it. Just lots of extra webbing to fasten fly to tent and the webbing doesn’t stay tight. I’ve figured out a system of keeping tight w duct tape, but thought I would ask since this is the same tent. I love the tent other than that. Especially the vestibules! I only sleep 2 people and gear, but it works perfectly. Last trip this weekend had some water come in top, but 2″/hr rain so ok w a couple drops. I plan on waterproofing fly next time I set it up.
Great idea on marking short and long on poles. I always have to lay them both out to determine which ones are which.
Do you recall if you put shorter poles under longer poles? Just seems too loose. I always stake out fly w guy wires to keep away from sides of tent.
I really appreciate your feedback!
Pam
Coupon Maven says
Yes, I really love this tent too! Our newer tent is much better space-wise when our family of five camps together, but we still use the RedHead for smaller campouts (parent-and-child scout campouts, etc.)
The longer poles go in first, then the shorter poles on top of those once the tent is already standing up. Try it that way — I’ve never experienced the kind of looseness in the fly that you’re describing, but maybe that will clear it up. I will post the instructions too soon.
Pam says
Thank you!
Coupon Maven says
Pam, here’s a photo of the setup instruction sheet from my RedHead tent (it is called a RedHead Geo-Dome Tent 10′ 5″ x 9′, Item #601-741):
I uploaded it at full resolution, so you should be able to open the image in a new window and save/print it if you want.
Pam says
Thank you for the photo of instructions! Happy camping to you and your family!
Pam
Clella says
Thanks for the article! We are in the market for a new bigger family tent and there are so many choices!! I have read a lot of reviews about failed zippers, rain getting in, and all the regular tent issues. I was just wondering how your tent is holding up? You have had the Ozarka a few years now, so do you still like it as much as you did when you first got it? Any issues? Thanks!!
Coupon Maven says
You’re welcome! We still love the tent (we just used it about three weeks ago again.) Zippers are still working well, and the tent itself is fine. We have only camped in it in the rain twice, once before I made the extended rain fly for it. We did get some rain dribbling through the door zipper during that trip, but it was also an extremely heavy rain. Once I added the extended fly, we’ve never had water in the tent again during rain.
Gina Perry says
I’ve been searching for this tent and can’t seem to find it. Do you have a model number (the Ozark trail with full rain fly). Thanks.
Coupon Maven says
It is this tent: Ozark Trail Ot 20 X 10 10p Dome Walmart # 550368797 — unfortunately, I don’t think it’s made anymore :( I originally wrote this post in 2014. We do still have the tent and love it. It’s a great size for a large family.
Coupon Maven says
Gina, if you are still searching for this tent, Ozark Trail has an updated version of it that appears to have come out in late 2018. You can still buy it in 2019, and it’s currently $79.00:
Ozark Trail 10-Person Freestanding Tunnel Tent with Multi-Position Fly